Archives for posts with tag: introduction

In many cases when you are building an application for the desktop or the web, the need arises to display a list of content to a user in which the user can scroll through, sort, search, select and modify content among other things depending on the needs of a given feature. A good framework that is designed to help build desktop or web-based applications will usually come stock with a list component that is both easy to use and easy to extended for each application’s unique needs. SproutCore is one such framework that is ready to provide you with such a component — the SC.ListView.

If you go to the official SproutCore site and follow the todo tutorial you’ll get a good initial sense of how simple the list view is to use. Right out of the box you can give the list view an array of objects and set it up pretty quickly for users to browse through content and interactive with. And most of what you need to program can be done through the list view’s exposed properties. However, as you work with the list view you may come to a point where the the way the content is listed and how you interact with it in the view can only go so far. You may feel like you want to come up with a unique way to list content that makes more sense for your particular needs. Does the list view allow you to create unique items in the list? Is it difficult to do? For the first question: Yes. For the second question: No.

In order to display each item in the list view, the list view makes use of a default list item called SC.ListItemView (located in the list_item.js file in the frameworks/desktop/view directory). If you look through the JS file you’ll notice a lot of code. This is because the list item view was designed to be very flexible so that you can do a lot with it out of the box. At first this might seem intimidating because it makes you think you will also have to write as much code yourself. Don’t be concerned. A good chunk of the code is devoted to rendering the list item’s many features and getting it set up so that you can edit content inline. What I’m here to do it get you introduced with the basics, and it really doesn’t take much. So with that being said, let’s dig in!

Part 1.1: Getting Ourselves Setup

Before we start writing a custom list item view, we need to get some stuff set up. First I want you to start with a fresh application by running sc-init and calling your application MyApp. Now that we have a foundation, I want you to go ahead and create a controller by doing the following:

sc-gen controller MyApp.testController SC.ArrayController

Open the newly created test.js file in the controllers directory and replace the content of the file with the following:


MyApp.testController = SC.ArrayController.create(
{
  selection: null,
  
  listEnabled: YES,
  
  listView: null,
  
  /**
    Note: This is a hack. Currently the SC.CollectionView does not correctly respond to 
    changes made to its isEnabled property. Therefore we have to force the collection 
    view to reload to make sure the view and its list item views correctly receive the 
    changes. 
    
    In addition, the SC.CollectionView does not handle changes to its isSelectable 
    property either. Sigh.
    
    Such is life working with a beta release. [Sept 6, 2009]  
  */
  listEnabledChanged: function() {
    var list = this.get('listView');
    list.set('isEnabled', this.get('listEnabled'));
    list.reload();
  }.observes('listEnabled')
}) ;

Now, open the main_page.js file in the english.lproj resources directory and replace all the code with the following:


MyApp.mainPage = SC.Page.design({

  mainPane: SC.MainPane.design({
    childViews: 'list toolbar'.w(),
    
    list: SC.ScrollView.design({
      layout: { top: 10, bottom: 30, left: 10, right: 10 },
      contentView: SC.ListView.design({
        layout: { top: 0, bottom: 0, left: 0, right: 0 }, 
        contentBinding: 'MyApp.testController'
      })
    }),
    
    toolbar: SC.View.design({
      layout: { bottom: 0, left: 0, right: 0, height: 30 },
      classNames: ['toolbar'],
      childViews: 'enableList'.w(),
      
      enableList: SC.RadioView.design({
        layout: { height: 20, width: 200, right: 10, centerY: 0 },
        items: [{ title: "Enable", 
                  value: YES },
                { title: "Disable", 
                  value: NO }],
        valueBinding: 'MyApp.testController.listEnabled',
        itemTitleKey: 'title',
        itemValueKey: 'value',
        layoutDirection: SC.LAYOUT_HORIZONTAL
      })
    })
  })

});

Next, create a new CSS file in the english.lproj resources directory called style.css and copy the following code into it:


div.custom-list-item-view div.top {
  position: absolute;
  top: 0px;
  left: 0px;
  right: 0px;
  height: 35px;
  border-width: 0px;
}

div.custom-list-item-view div.top.standard {
  background-color: #c0c0c0;
}

div.custom-list-item-view p.name {
  float: left;
  padding: 0px;
  margin: 5px 0px 0px 5px;
  font-family: Georgia;
  font-size: 2em;
  font-weight: bold;
  line-height: normal;
}

div.custom-list-item-view div.bottom {
  position: absolute;
  top: 35px;
  left: 0px;
  right: 0px;
  height: 15px;
}

div.custom-list-item-view div.bottom.standard {
  background-color: #e3e3e3;
  border-bottom-color: black;
  border-bottom-width: 3px;
  border-bottom-style: solid;
}

div.custom-list-item-view p.item {
  float: left;
  padding: 0px;
  font-family: Helvetica;
  font-size: 1em;
  line-height: normal;
}

div.custom-list-item-view p.company {
  margin: 0px 0px 0px 5px;
}

div.custom-list-item-view p.title {
  margin: 0px 0px 0px 10px;
}

div.custom-list-item-view span.label {
  font-weight: bold;
}

div.custom-list-item-view span.value {
  margin-left: 5px;
  font-style: italic;
}

.toolbar .sc-radio-button {
  margin: 0px 10px 0px 0px;
}

Finally, let’s updated the main.js file located in the app’s root directory. Replace the file with the following code:


MyApp.main = function main() {

  
  MyApp.getPath('mainPage.mainPane').append() ;

  var content = [
    SC.Object.create({ 
      fname: 'John', 
      lname: 'Doe', 
      company: 'Google',
      title: 'Senior Manager' 
    }),

    SC.Object.create({ 
      fname: 'Bob', 
      lname: 'Smith', 
      company: 'Microsoft', 
      title: 'Sales'
    }),
    
    SC.Object.create({ 
      fname: 'Fred', 
      lname: 'MacDoogle', 
      company: 'Apple', 
      title: 'Developer'
    })
  ];

  var controller = MyApp.testController;
  controller.set('content', content);
  
  var listView = MyApp.mainPage.mainPane.childViews[0].contentView;
  controller.set('listView', listView);

} ;

function main() { MyApp.main(); }

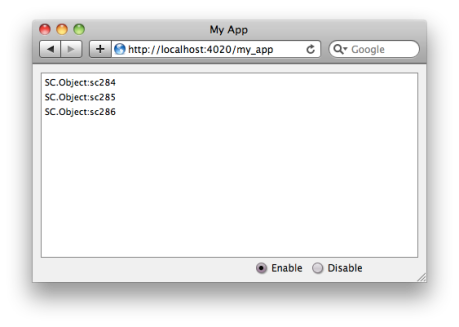
Awesomeness. If you run the app you won’t see much even though we have wired the list view to the controller. That’ll change soon. Just remember that we are getting things set up quickly for the purposes of this tutorial, not because we are trying to make a real, professional application :).

Here’s what you should see so far:
custom-list-item-p1-default

Part 1.2: Creating Our Custom List Item View

To start making a simple custom list view item we have to create a new view, which we’ll do by running the following command:

sc-gen view MyApp.CustomListItemView

To get us started we need two things: 1) a content property; and 2) a way to render the content. (The objects making up the content are located in the main.js file). Hmm. If you’ve read my prior posting on this blog, those two things seem familiar… Familiar like… like… like creating a custom view! This means we can leverage what we’ve learned before. (If you’re new to this blog or haven’t had a chance to read up on how to create a simple custom view, start by reading posts here and here).

For out custom list item view, we want it to look like the following:

custom-list-item-view

As you can see above, our view will display a person’s first name, last name, the company the person works for, and the title the person holds at the company. Let’s update the custom list item view’s code to be the following:


MyApp.CustomListItemView = SC.View.extend(SC.ContentDisplay, {

  classNames: ['custom-list-item-view'],

  contentDisplayProperties: 'fname lname company title'.w(),
  
  render: function(context, firstTime) {
  
    var content = this.get('content');
    var fname = content.get('fname');
    var lname = content.get('lname');
    var company = content.get('company');
    var title = content.get('title');

    context = context.begin().addClass('top');
    context = context.begin('p').addClass('name').push('%@, %@'.fmt(lname, fname)).end();
    context = context.end(); // div.top
    
    context = context.begin().addClass('bottom');
    context = context.begin('p').addClass('item').addClass('company');
    context = context.begin('span').addClass('label').push('Company:').end();
    context = context.begin('span').addClass('value').push(company).end();
    context = context.end(); // p.item.company
    context = context.begin('p').addClass('item').addClass('title');
    context = context.begin('span').addClass('label').push('Title:').end();
    context = context.begin('span').addClass('value').push(title).end();
    context = context.end() // p.item.title
    context = context.end() // div.bottom
    
    sc_super();
  }

});

This is enough to get us to the point where we can set up our list view to show our custom list view item. But how do we get our list view to actually display the custom list view item? Hmm. Well, it turns out that SC.ListView extends another view called SC.CollectionView. SC.CollectionView is the root view to display a collection of views. In SC.CollectionView it has a property called exampleView (collection.js, line 286) that when given a view, it will use it to display all the content objects in a given array. And as you’ll notice, the default setting for exampleView is SC.ListItemView — Ta-da!

Looking at the comments for the exampleView property, you’ll see that the three most important properties the example view should have are the following:

  • content – The content object from the content array your view should display
  • isSelected – True if the view should appear selected
  • isEnabled – True if the view should appear enabled

So it would appear that the list view has a bit of a contract with the view used to display its array of content. We’ll start with the content property and work our way to using the isSelected and isEnabled property. As a side note, the list view, or actually the collection view, also supplies the example view with some additional attributes, but I’ll get to that when I post part two of this tutorial… I just had to toss that in there ;).

In the main_page.js file, update the list view so that we set the exampleView property like so:


list: SC.ScrollView.design({
  layout: { top: 10, bottom: 30, left: 10, right: 10 },
  contentView: SC.ListView.design({
    layout: { top: 0, bottom: 0, left: 0, right: 0 }, 
    contentBinding: 'MyApp.testController',
    exampleView: MyApp.CustomListItemView,
    rowHeight: 54,
    rowSpacing: 0
  })
})

That’s all ya need to do. (In addition to setting the exampleView property, we also set the list view’s rowHeight and rowSpacing properties). Now go ahead and refresh your browser to see the result. You should get something that looks like the following:
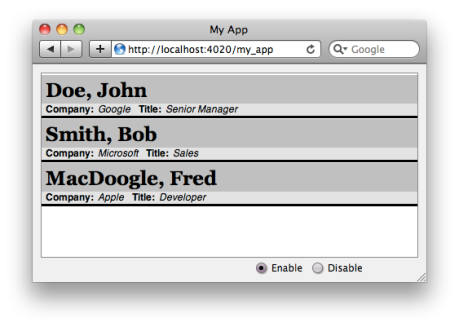
custom-list-item-p1-custview

Pretty sweet! That really didn’t take much effort. Now, bare in mind that we are just rendering the content and not doing much else. So our custom list item view is okay but we can do better. Let’s update our custom list item view so that when the user selects it in the list view, the list item view will update to visually indicate it is currently selected. How do we actually go about doing this? Remember that contract that the list view has with its example view? Well we’re going to take advantage of the isSelected property that the list view adds to our custom list item view.

Part 1.3: Becoming Selected

When a user selects an item in the list view, the list view will set the selected list item view’s isSelected property. We can take advantage of this by updating our view to be the following:


MyApp.CustomListItemView = SC.View.extend(SC.ContentDisplay, {

  classNames: ['custom-list-item-view'],

  displayProperties: 'isSelected'.w(),

  contentDisplayProperties: 'fname lname company title'.w(),
  
  render: function(context, firstTime) {
  
    var content = this.get('content');
    var fname = content.get('fname');
    var lname = content.get('lname');
    var company = content.get('company');
    var title = content.get('title');
    var isSelected = this.get('isSelected');
    
    var standard = !isSelected;
    var selected = isSelected;
    var classes = { 'standard': standard, 'selected': selected };
  
    context = context.begin().addClass('top').setClass(classes);
    context = context.begin('p').addClass('name').push('%@, %@'.fmt(lname, fname)).end();
    context = context.end(); // div.top
    
    context = context.begin().addClass('bottom').setClass(classes);
    context = context.begin('p').addClass('item').addClass('company');
    context = context.begin('span').addClass('label').push('Company:').end();
    context = context.begin('span').addClass('value').push(company).end();
    context = context.end(); // p.label.company
    context = context.begin('p').addClass('item').addClass('title');
    context = context.begin('span').addClass('label').push('Title:').end();
    context = context.begin('span').addClass('value').push(title).end();
    context = context.end() // p.label.title
    context = context.end() // div.bottom
    
    sc_super();
  }

});

What did we just do? Basically we updated the code so that the view will re-render when the isSelected property is updated by the list view. As well, we updated the render method so that parts of the view will either have “standard” or “selected” applied to the class attribute. If isSelected is true then “selected” will be added to an element’s class attribute. If isSelected is false then only “standard” will be added to an element’s class attribute. (Notice how we took advantage of the render context object’s setClass method). Easy, right? Go ahead and refresh your browser and select the items in your list view. What did you get? Nothing changed? Uh-oh. Something’s not right. We’re missing something. Remember the CSS file I had you create earlier on? Well it needs to be updated to take advantage of the “selected” class that gets added to the HTML elements. Add the following to your CSS file:


div.custom-list-item-view div.top.selected {
  background-color: #2222FF;
}

div.custom-list-item-view div.bottom.selected {
  background-color: #9999FF;
  border-bottom-color: black;
  border-bottom-width: 3px;
  border-bottom-style: solid;
}

Great. With the CSS file updated to make use of the “selected” class, let’s go back to our browser and refresh it. Select the list item views. You should get something like the following:
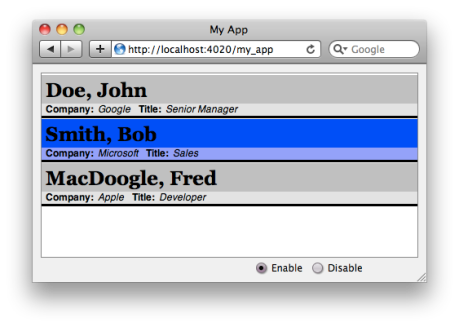
custom-list-item-p1-selected

Success! Now we got our custom list view to be interactive and it didn’t take much work to do it. Woot! Okay, so that’s the isSelected property down. We’re almost done.

Part 1.4: Enabling and Disabling

How about we wrap up and make use of the isEnabled property. Just as a heads up, as of this writing, Sept 6, 2009, the SC.CollectionView doesn’t properly update when the isEnabled property is changed. So I had to do a bit of a hack that you can see if you look at the code in the test controller. I was working on fixing the problem, but I decided to just go ahead and shoot out this post. SproutCore is still in beta after all. With that being said, let’s go ahead and update your custom list item view’s code one more time:


MyApp.CustomListItemView = SC.View.extend(SC.ContentDisplay, {

  classNames: ['custom-list-item-view'],

  displayProperties: 'isSelected isEnabled'.w(),

  contentDisplayProperties: 'fname lname company title'.w(),
  
  render: function(context, firstTime) {
  
    var content = this.get('content');
    var fname = content.get('fname');
    var lname = content.get('lname');
    var company = content.get('company');
    var title = content.get('title');
    var isSelected = this.get('isSelected');
    var isEnabled = this.get('isEnabled');
    
    var standard = isEnabled && !isSelected;
    var selected = isEnabled && isSelected;
    var disabled = !isEnabled;
    var classes = { 'standard': standard, 'selected': selected, 'disabled': disabled };
  
    context = context.begin().addClass('top').setClass(classes);
    context = context.begin('p').addClass('name').push('%@, %@'.fmt(lname, fname)).end();
    context = context.end(); // div.top
    
    context = context.begin().addClass('bottom').setClass(classes);
    context = context.begin('p').addClass('item').addClass('company');
    context = context.begin('span').addClass('label').push('Company:').end();
    context = context.begin('span').addClass('value').push(company).end();
    context = context.end(); // p.item.company
    context = context.begin('p').addClass('item').addClass('title');
    context = context.begin('span').addClass('label').push('Title:').end();
    context = context.begin('span').addClass('value').push(title).end();
    context = context.end() // p.item.title
    context = context.end() // div.bottom
    
    sc_super();
  }

});

Like the isSelected property, we are just doing the same thing with the isEnabled property where we set the “disabled” class to parts of our view. Nothin’ to it. We’re going to have to update our CSS file one more time by adding the following to the file:


div.custom-list-item-view div.top.disabled {
  background-color: #f0f0f0;
  color: #d0d0d0;
}

div.custom-list-item-view div.bottom.disabled {
  background-color: #ffffff;
  color: #d0d0d0;
  border-bottom-color: #c0c0c0;
  border-bottom-width: 3px;
  border-bottom-style: solid;
}

Okay. Now you can go ahead and refresh your browser. Click on the disable radio button that is down in the bottom-right of the window. If everything went as planned your view should look like the following:
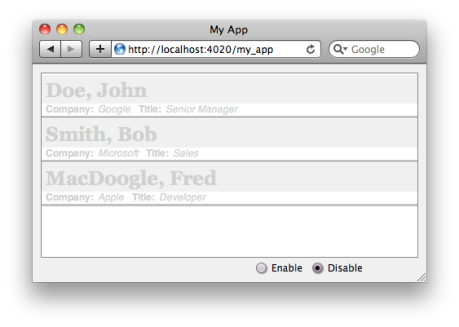
custom-list-item-p1-disabled

You did it! The custom list items now look disabled. If you click on the enabled radio button the list items will return to their standard look. Again, there really wasn’t much effort to get this working.

As another one of those beta issues, you can still click on the items in the list view and the list view’s selection property will still be updated. D’oh. As the comments say in the collection.js file for the isEnabled property, nothing should be selectable. There is the same issue with the collection view’s isSelectable property. Again, beta. I’m not sure if anyone else in the SproutCore community has been working on fixing this, but I am in the middle of trying to correct the problem.

Part 1.5: Until We Meet Again

There ya go. You’ve successfully created your own custom list item view making use of the three properties: content, isSelected and isEnabled. Now I should stress that this custom list item view is not nearly as feature complete as the default SC.ListItemView, but that’s okay. If you rather make use of the SC.ListItemView to take advantage of all it has to offer you can by simply extend it and overriding its various methods.

In second part of this tutorial, I will be going into some more advanced things you can do when creating a custom list item view. But until then, have fun programming in SproutCore!

A while ago I mentioned in a post that in order to “get” how the SproutCore framework works you really have to understand SproutCore’s key-value-observing (KVO) and binding paradigm since they are so central in how the rest of the framework works.

Looking back at that post, I realized that my explanation of KVO and bindings was too general and hand-wavy and may not make sense to a person new to SproutCore. In an effort to help all those out, I’m going back to the topic of KVO and bindings but this time making things (hopefully) more obvious and concrete.

Now bare in mind that KVO and bindings are big topics and there’s a lot to know behind the scenes. Therefore I’m going to be taking you down the path one simple step at a time. So, you know, brace yourself. Grab a beer while you’re at it.

Part 1: Theory is as Theory Does

Let’s first start out with a bit of background and theory. Now, now. No snoring in the back of the class ;).

When you normally work with JavaScript, you know that you can create an object pretty easily that consists of regular properties and methods like in the following ways:


/* A very simple way to create an object */
var user = {
  firstName: 'John',

  lastName: 'Doe',

  getFullName: function() {
    return firstName + ' ' + lastName
  }
}

/* Another, improved, way to create an object */
function UserObject(fname, lname) { /* a function acting as a class constructor */
  this.firstName = fname,
  this.lastName = lname
}

UserObject.prototype.getFullName = function() {
  return this.firstName + ' ' + this.lastName;
}

var user = new UserObject('John', 'Doe');

Pretty basic. When building a web-based application, or rich internet application (RIA) as people like to sometimes say now, you make lots and lots of objects in order to implement interesting functionality and modularize your work. Right? And when building your web app you no doubt have different visual components that display information about those objects and modify them.

If you’re following good design practices you probably even embrace the Model-View-Controller (MVC) architectural pattern to further structure your code into logical groups and ensure you decouple your domain model from your views using controllers. However, depending on how you tackle MVC you may end up writing a lot of plumbing/boiler-plate/glue code to get everything to work, such as making sure a model object is updated when you modify information in the view, syncing information between two or more views and so on.

Writing such code is annoying, time consuming and error-prone. It would be so much easier if you could have some mechanism that did most or all of the work to connect views, controllers and objects for you so you can focus on getting the real functionality done. Do I hear an “amen, brother” coming from you ;)?

Well wouldn’t it be great if you could just change an object’s property and any object that observes that property gets notified of the change automatically, but without having to write all the plumbing to make that happen? Yes. So what we want is to observe a property (or, rather, a key) and be notified when its value changes. Hmm… key… value… observing — Key-value-observing!

Let’s focus our attention on this observing term for a moment. If you’re up to par on your software design patterns, you’ve probably heard of the observer pattern written by the Gang of Four (GoF). The observer pattern is a great generalized solution that allows one object to observe (or listen for) changes or get notifications on another object, but in a decoupled way. Take a look at the following diagram that shows the observer pattern.

kvo-bindings-observer-pattern

See how the class Bar inherits the FooObserver interface? This decouples the Foo object from caring about the specific underlying type and only cares that an object inherits the FooObserver interface. For every object that inherits the FooObserver interface and registers with a Foo object, the Foo object will notify each observer after some change has occurred. Pretty cool, eh? But what does all this mean for the SproutCore framework? Well, as you may have guessed by now, SproutCore takes advantage of this observer pattern as a central corner stone towards making KVO and bindings a reality. Let’s go back to SproutCore now and see this observer pattern in action.

Part 2: Minding Your Ks, Vs and Os

All objects in SproutCore ultimately derive from SC.Object, and when you make your own class that derives from SC.Object is looks like the following example:


MyApp.User = SC.Object.extend({
  /* add your class's special properties and methods here */
})

The User class above now inherits all of SC.Object‘s properties and methods. But if you first shift through the code that makes up SC.Object (object.js in the frameworks/runtime/system directory) you don’t see any kind of observation logic. All the observation logic is actually contained within a mixin called SC.Observable (observable.js in frameworks/runtime/mixins directory). The SC.Observable properties and functions get added to SC.Object. And since that functionality is now part of SC.Object that means all objects that derive from SC.Object also get SC.Observable logic. Okay, great. Now that we’ve located the observation logic let’s dig in.

Although there is a lot of functionality in SC.Observable let’s focus on a select few functions, namely set, addObserver, removeObserver… Wait, what were the the last two functions called again?! addObserver and removeObserver. Doesn’t that sound awfully familiar? Yep. Okay, take a moment and look at the declarations for addObserver and removeObserver, you have the following:


addObserver: function(key, target, method, context)

removeObserver: function(key, target, method)

The addObserver method takes four parameters. The first argument is a key (a property) of the object we want to observer. The second argument is a target which is the the object that wants to be notified of changes to the given key (again, property). The third argument is a method that is to be called on the target so that the target is actually notified of changes to the key. The fourth argument, context, isn’t important for this post, but it is passed to the target when it’s method is called to help give additional information about the notification.

The removeObserver method is almost the same, but it takes three arguments instead of the four. And as you can guess the method is to remove a target’s observation of a given key.

By assigning a value to a SproutCore object’s property using the set method, set will assure that the object’s that are observing the given property are notified, which will happen either immediately or later on. I’ll get to what “later” means soon.

So this is good stuff. We now have some important concepts about KVO under our belt. Now its time to see what this actually means. What we’re going to do is create a very small SproutCore application to get some objects set up, and we’ll be using a browser’s JavaScript console to see what is happening in real time as we hook the objects together. Use Firebug for Firefox or the JavaScript console that already comes with Safari and Google Chrome.

Go ahead and create a new SproutCore application using the sc-init tool and call your application MyApp. Great. Now, to keep things simple so that we can follow along with what is happening, we’ll create two basic SproutCore objects. The first object is an object whose properties we will change. The second object will be observing the changes. Create two new JS files under the app/my_app directory and call them user.js and the second monitor.js. In the user.js file, enter the following code:


MyApp.User = SC.Object.extend({

  firstName: '',

  lastName: '',

  age: 0

});

And for the monitor.js file enter the following:


MyApp.Monitor = SC.Object.extend({

  notifyPropertyChange: function(sender, key) {
    console.log( 'property %@ set to %@ for object %@'.fmt(key, sender.get(key), sender) );
  }

});

Good. For the monitor object, we’re just going to be watching for changes to a user object and writing information about it to the JavaScript console. (Note that for the method notifyPropertyChange we could have equally not provided any arguments but still get notified, minus any information. As well, you can add on another two arguments, value and rev. The value argument isn’t currently used in SproutCore and rev is beyond the scope of this post).

Alright. It’s time to fire up your browser of choice and follow along in the JavaScript console. I’ll be using Apple’s Safari.

In your console, first create an instance of a User object like so:

var user = MyApp.User.create();

Now create an instance of a Monitor object:

var monitor = MyApp.Monitor.create();

Perfect. We want the monitor object to observe a property on the user object. Let’s make it observe the firstName property. We do this by entering the following:

user.addObserver('firstName', monitor, 'notifyPropertyChange')

So this now makes the monitor object observe the user’s firstName property. Now let’s see what happens when we modify the first name. Enter the following:

user.set('firstName', 'Joe')

If everything went okay, what did you just see happen in the console? Did you get something that reads like the following:

property firstName set to Joe for object MyApp.User:sc263

You did? Success! Congratulations you have successfully got the monitor object to be an observer of user object. You’re now on your way to understanding KVO!

If you want to know if a property of an object does have observers you can call the object’s observersForKey** method, like so:

user.observersForKey('firstName')

You’ll get back true since the property does have an observer. What happens if you change the value of the lastName property of the user object? Let’s find out. Enter the following:

user.set('lastName', 'Doe')

Nothing got outputted to the console. That’s because the monitor is not observing the lastName property; however, if you check the value of lastName it was updated properly.

We’ve got to the point where we can now see how the SproutCore framework is making use of the observer pattern to act as a building block for key-value-observing. Now we’ll look at what builds on top of KVO and the observer pattern: bindings.

Part 3: The World is Nothing but a Bowl of Bindings

I will fully admit that when I first crossed paths with SproutCore bindings concept I was a bit mystified about what it was and how they actually worked. So if you feel like you didn’t or still don’t get bindings don’t feel alone. That being said, after working with the SproutCore framework to do my work, I quickly became comfortable with the idea of why they are so darn useful. Let me see if I can walk you through it.

The central premise of a binding is to connect one object’s property with another object’s property and communicate changes between those properties. Really. That’s it. All we’re doing is keeping properties in sync. Take a look at the following picture.

bindings-basic-concept

Above we can see that on the left there is an object A that has a property named foo, and on the right there is an object B that has a property named bar. The binding object you see in the middle is what acts an the intermediary, or go between, in assuring that when foo is changed then bar is updated with the same value. And when bar is changed that foo is updated with the same value. We can see this in the following diagram:

bindings-how-it-works

Okay, that’s cool. The concept seems kind of trivial after you take a step back and look at it. And SproutCore is designed so that working with bindings to synchronize the values of properties is simple, such as in the following code:


var objA = SC.Object.create({

  foo: ''

});

var objB = SC.Object.create({

  bar: '',

  barBinding: 'objA.foo'

})

That’s all it took to bind the properties together. All we had to do was add barBinding as a property of objB and assign the value objA.foo to it. SproutCore takes care of the rest automatically. In fact, let’s give it a try! Remember the SproutCore app we made back when discussing KVO? Go ahead and reload the page if your browser is still has it open. Now open up the JavaScript console and begin by typing in the following:

var objA = SC.Object.create({ foo: ''})

We have objA loaded into memory. Enter the following into the console:

var objB = SC.Object.create({ bar: '', barBinding: 'objA.foo' })

Now we have objB loaded into memory and its bar property is bound to objA’s foo property. Fo’shizzle. If you do a get on either property they will both have empty strings, which is what we expect. Now let’s go ahead and change the value of foo in objA. Type in the following:

objA.set('foo', 'cat')

Go ahead and check the value of foo by calling objA.get('foo'). The value should be cat. And because foo is bound to bar that must mean that bar is cat too! Check by calling objB.get('bar'). Yes! We see that bar is now… an empty string?!? Oh no! What did we do wrong?! Remember back when I talked about KVO and I said that when you call the set method to modify the value of a property, the observers of the property can get notified either immediately or later? Well this is the later part I was refering too. Surprise!

When you use bindings in SproutCore they do transfer the value from one property to another but it is deferred. The changes that go through bindings actually get queued up. Why? Welcome to the world of SproutCore’s run loop mechanism. Yay, yet more to know ;).

I won’t say too much about the run loop since that’s a big topic in and of itself. However, all you need to know is that the run loop is a central device to coordinate how events get propagated and property values get changed using bindings, among other things. So what does this mean for us? It means that we have to kick the run loop to get things rockin’. Let’s go back to our JavaScript console. If you haven’t done anything after the last step we took (objB.get('bar')), then go ahead and type in the following:

SC.RunLoop.begin()

And now type this:

SC.RunLoop.end()

Finally, check the value of objB’s bar property by once again calling objB.get('bar'). Holy crap on a cracker! It worked! bar is now set to cat! As Cartman from South Park likes to say, “sweeeeeeet”. Since we’re on a role, let’s change the value of objB’s bar property by first doing the following:

SC.RunLoop.begin()

Now go ahead and change the value of bar by entering objB.set('bar', 'dog'). Finish with the following:

SC.RunLoop.end()

Now check the value of foo by entering objA.get('foo'). It’s dog! This is great. We see that the binding has actually synced the properties foo and bar.

While you may have this sense of warm, fuzzy feelings, you may also have this other thought in the back of your head saying what we did is very cool, but I don’t get how SproutCore really got the properties connected. All I see is this special property called barBinding. What did SproutCore actually do? If you didn’t have this thought rolling around in your noggin’ I’ll pretend that you did. Work with me here.

It’s time to pull back the curtains and see what’s going on behind the scenes that make this seemingly trivial binding mechanism work.

Part 4: Deeper Into the Binding Abyss We Go

In SproutCore bindings are objects just like anything else. No special magic here. That means you actually have to create an instance of a binding and set it up to connect properties together, but SproutCore takes care of that for you. And bindings work like other objects that just want to observe the changes to some other object’s property. That would mean, yep, that bindings are leveraging KVO. And if they are leveraging KVO then its a good bet that they are probably adding themselves as observers to an object. Are you recognizing a running theme going on?

Let’s go back to the SC.Observerable code in the observable.js file. If we look around the file a bit more you’ll come across a method called bind that has the following declaration:

bind(toKey, target, method)

This method is what you can use to do manual binding on an object’s key. If you read the comments for the method it says that this is the manual equivalent of doing the more traditional propertyBinding: 'property path' approach. Ah, interesting. Looking at the body of the method you’ll notice that a binding object gets created:


// Starting at line 1068 of observable.js (SproutCore v1.0 Beta)
var pathType = SC.typeOf(target) ;
if (pathType === SC.T_STRING || pathType === SC.T_ARRAY) {
  binding = this[toKey + 'BindingDefault'] || SC.Binding; // 1) Get the binding class
  binding = binding.beget().from(target) ; // 2) Now create the binding
} else binding = target ;

Basically we see that the binding is either being derived from a path (a property path) or it is the target argument. It’s the path we’re focusing on. I added comments just to make it a bit clearer. The given target (an object) is assigned to the binding’s “from” property. This is one end of the binding. What about the other end? Look further down the body of the method and you’ll see these lines of code:


// Starting on line 1075 of observable.js (SproutCore v1.0 Beta)
binding = binding.to(toKey, this).connect() ;
this.bindings.push(binding) ;

Above we now see the called object being passed to the binding’s to method. So the object is now assigned to the binding’s to property — the other end of the binding. The binding has a from and a to. This seems to imply direction. It does. With bindings we can control the flow of information by manipulating what is actually assigned to a propertyBinding property. However, for now, let’s not worry about manipulating flow and data being passed through a binding. We’ll just keep focusing on the basics. The default binding used will make sure that two properties are always in sync with each other.

Right after a binding’s to property is set the final thing to do is call the binding’s connect method. Despite what you might think, the call to connect doesn’t bind properties together immediately. Instead, the bind object is passed to a queue to then later connect properties together. If you’re asking if this has anything to do with SproutCore’s run loop mechanism, you’d be right.

The real guts and the glory happens in another method called _connect which is intended to be private. You can find the method starting on line 347 in the observable.js. There’s a bunch of code going on here, but just laser in on two lines: line 379 and line 384, where you’ll see the following:


SC.Observers.addObserver(path, this, this.fromPropertyDidChange, root) ; // 379

SC.Observers.addObserver(path, this, this.toPropertyDidChange, root) ; // 384

Notice anything that stands out like a sore thumb? It would be the addObserver method. Hello old friend. We’re right back to where we started. Yep. The binding is just leveraging KVO and the observer pattern so it can be notified when either a particular property on the from object changes or when a property on the to property changes. There’s obviously a lot of code to make this all happen, but it rests on the fundamentals. There is no spoon.

That was a lot to take in and we haven’t even had a chance to do anything in part 4 of this blog post. Well, guess what? Let’s jump back into our JavaScript console and take the bind method for a ride.

First, reload your web application we created earlier on so we can start fresh. We’re going to be using our trusty objA and objB that we’ve used in the last few coding exercises in this blog entry. Create objA like so:

var objA = SC.Object.create({ foo: '' })

And go ahead and create objB like so:

var objB = SC.Object.create({ bar: '' })

Notice that we didn’t include the barBinding this time because we’re going to manually create the binding with the bind method, which we’ll do right now:

objB.bind('bar', 'objA.foo')

Great. We’ve got the binding preped. Let’s go ahead and modify the value of foo:

SC.run(function() { objA.set('foo', 'cat') })

The run method is just a more convenient way of executing the run loop with a given anonymous function. If we check the value of bar and foo, what do we get? cat! Awesome. The manual binding worked. Now let’s go the other way:

SC.run(function() { objB.set('bar', 'dog') })

And what do we get when we check the values of the properties? dog! We are at zen with the universe.

Part 5: The Long Journey Home to propertyBinding

Great we’ve figured it all out. The observer pattern, KVO and bindings. It took some time but hopefully you found the journey worth it. Good luck and thanks for all the fish.

… But wait! There’s one more thing we haven’t figured out. Just how does SproutCore detect the propertyBinding on an object and covert it into a actual binding object? Ah, yes. Let’s tackle this final puzzling question.

Jump over to the SC.Object in the object.js file and take a look and the class’s initialization method init starting on line 446. The body of the method is pretty small but there’s definitely one import line that speaks volumes to us: this.initObservable(). Initialize observable, eh? Hmm. Okay, now let’s jump back over to the SC.Observable mixin in the observable.js file and go to the initObservable function. Looks pretty meaty, right? Not to worry. We’ll just go to line 843 where bindings get created. And here’s the code:


this.bindings = [];
if (keys = this._bindings) {
  for(loc=0;loc<keys.length;loc++) {
    // get propertyKey
    key = keys[loc] ; value = this[key] ;
    var propertyKey = key.slice(0,-7) ; // contentBinding => content
    this[key] = this.bind(propertyKey, value) ;
  }
}

The logic above is iterating over the object’s array called _bindings which is a pre-compiled list of properties that were already determined to have a key with a suffix of “Binding”. The suffix “Binding” is sliced off from the key to give us the actual property name. With the key and it’s assigned value, the object’s bind method is called to set up the binding. Okay, great. This partly answers our question of how the bindings are set… but where did this pre-compiled array of properties that have keys with “Binding” as a suffix come from? More to discover! And you thought this would be just a walk in the park ;). We’re almost there. There’s one final piece to the puzzle.

When an object is created using the SC.Object‘s create method, you can extend it with your own properties and methods. As well, when you extend a class to create a new class you use SC.Object‘s extend method. Okay, you’re asking yourself so what? Both of these methods are two sides of the same coin to our final answer.

When you extend a SproutCore class, the extend function does some interesting stuff. One of those interesting things is to create a new function that will be the class’s constructor, which if you go to line 240 in object.js you will see it. In the constructor it makes a call to SC._object_init. SC._object_init is the actual method that gets called first when you create an instance of a class in SproutCore. The method will in turn call the init method that will initialize the object’s observers. We’ll come back to SC._object_init in a second. Further down in the extend function is another interesting statement on line 256 where there is a for-loop making calls to SC._object_extend. What’s SC._object_extend? Just wait. Switching back to SC._object_init, go to line 376. What do you see? Why it’s another for-loop making calls to SC._object_extend. This is the final piece to the puzzle.

Go to the function SC._object_extend on line 37 in the object.js file. If you read the comments for the function you’ll see a statement that says the following:

prepping a list of bindings, observers, and dependent keys

Preparing a list of bindings? Ah-ha! A clue. There’s a lot going on inside of SC._object_extend but the function is basically taking the properties and methods from one object and sticking them on to the object that is to be extended all while doing some special processing. Take a look at line 65 that has the following statement:

var bindings = base._bindings, clonedBindings = NO;

Yes! We’ve found were the base object’s _bindings array is added. Now where does the array get its content from? Inside the for-loop that iterates over the keys, take a look at lines 90 to 101 where you’ll see the following:


// Possibly add to a bindings.
if (key.slice(-7) === "Binding") {
  if (!clonedBindings) {
    bindings = (bindings || SC.EMPTY_ARRAY).slice() ;
    clonedBindings = YES ;
  }

  if (bindings === null) bindings = (base._bindings || SC.EMPTY_ARRAY).slice();
  bindings[bindings.length] = key ;

  // Also add observers, outlets, and properties for functions...
}

From above, look at the second line down. It’s an if-statement that checks if the key has the suffix “Binding” — Eureka! We’ve finally found where all those properties with the word “Binding” get collected to be later processed in the initObservable in SC.Observable.

Now you finally know how we got from the propertyBinding: 'property.path' approach to actually making a binding between two objects’ properties.

That’s All Folks!

There has been a lot to take in to really understand how two central concepts in SproutCore, KVO and bindings, really work. While there are still many more things to know about SproutCore, this will hopefully take a lot of the mystery out of what it really going on behind the scenes.

Oh ya. At the beginning of this post I told you to get a beer. I’m sure by now you’ve probably ended up drinking three or four beers and that means you forgot what you read half way through ;). Sorry.

Have fun!

** (Update: Feb 14, 2010) The observersForKey does not function correctly in SproutCore v1.0. It now throws an type error when provided a key string.

In part 1 of how to make a simple custom view, we focused on the very fundamentals. The three main things we learned were: 1) how to add basic properties to a view that will cause the view to be re-rendered; 2) The need to override the render() method from the base class SC.View; and 3) how to build the HTML in the render method using the passed in context argument that is a SC.RenderContext object. For the second part of how to make a simple custom view, we are going to look at how to instead assign an object to our view and use it to render. If you have completed part 1 of this tutorial you should have all the code ready that we’ll make modifications to.

So let’s pretend that we rather have our user summary view make use of an object in our domain model to display a user’s name, description and age. Therefore, we need to make sure that the model object has three properties, which, as you may have guessed, is a name, description and age property. We’ll create a simple User object that will supply all three properties. Below is a visual of what will be happening:

view_model_assignment

For the purposes of this tutorial, we’ll just be focusing on creating a very simple SproutCore object even though there are more preferred methods of making a model object for a SproutCore application. So with that being said, let’s first create our new user object. Just to get us going, we’ll place the code for our user object in our application’s apps/my_app directory where you should see a core.js file. In the directory create a new file called user.js. Now open up the file and enter the following:


MyApp.User = SC.Object.extend({
	
  name: '',
	
  description: '',
	
  age: ''
	
});

That’s it? That’s it. Notice how how we are extending the SC.Object to create our user object. That way we’ll gain the advantages of SproutCore’s key-value observing (KVO) mechanism.

Okay, great. Now we can go back and focus our attention on our user summary view. From the end of the part 1 tutorial we ended up with our user summary view being the following (see my updates for the changes I made to the view):


MyApp.UserSummaryView = SC.View.extend({

  classNames: ['user-summary-view'],

  name: '',

  description: '',

  age: 0,

  displayProperties: ['name', 'description', 'age'],

  render: function(context, firstTime) {
    var name = this.get('name');
    var description = this.get('description');
    var age = this.get('age');

    context = context.begin('div').addClass('user-summary-view-name').push(name).end();
    context = context.begin('div').addClass('user-summary-view-desc').push(description).end();
    context = context.begin('div').addClass('user-summary-view-age');
    context = context.begin('div').addClass('user-summary-view-age-value').push(age).end();
    context = context.begin('div').addClass('user-summary-view-age-capt').push('age').end();
    context = context.end();

    sc_super();
  }

});

We’re going to play a bit of doctor here and pull some the view’s guts out and and replace it with new parts… Hmm, perhaps I should lay off watching medical surgery shows on TV. Anyway. First things first, let’s strip our view down to the following:


MyApp.UserSummaryView = SC.View.extend({

  classNames: ['user-summary-view'],

  render: function(context, firstTime) {
    var name = '';
    var description = '';
    var age = '';

    context = context.begin('div').addClass('user-summary-view-name').push(name).end();
    context = context.begin('div').addClass('user-summary-view-desc').push(description).end();
    context = context.begin('div').addClass('user-summary-view-age');
    context = context.begin('div').addClass('user-summary-view-age-value').push(age).end();
    context = context.begin('div').addClass('user-summary-view-age-capt').push('age').end();
    context = context.end();

    sc_super();
  }

});

We got rid of the view’s basic properties, the displayProperties property, and render() method is no longer making use of those properties. Awesome. Now what? Now let’s update the view to first be the following:


MyApp.UserSummaryView = SC.View.extend(SC.ContentDisplay, {

  classNames: ['user-summary-view'],

  contentDisplayProperties: 'name description age'.w(),

  render: function(context, firstTime) {
    var name = '';
    var description = '';
    var age = '';

    context = context.begin('div').addClass('user-summary-view-name').push(name).end();
    context = context.begin('div').addClass('user-summary-view-desc').push(description).end();
    context = context.begin('div').addClass('user-summary-view-age');
    context = context.begin('div').addClass('user-summary-view-age-value').push(age).end();
    context = context.begin('div').addClass('user-summary-view-age-capt').push('age').end();
    context = context.end();

    sc_super();
  }

});

Whoa. What’s this content thing’a’ma’bob all about? What we want to do is get our view to observe a given content object. The “content” object can be any type of object. All the view will care about is that it, again, has a name, description and age property. Our view now extends not just our custom logic but also a SC.ContentDisplay mixin. (A mixin is just a set of properties and methods that can be added to any object). The SC.ContentDisplay adds logic to our view that will monitor a content property and detect changes to the content’s properties. The contentDisplayProperties is what we now use to say what content properties we want to trigger a render, which is the content’s name, description and age properties.

(Side note: the w() method is just a convenience to convert a string of words into an array object. The SproutCore framework extended the JavaScript String object to include it among other methods.)

Now that we’ve made the first set of changes to our view, let’s go ahead and modify the render method to make use of the content property. Update the render method to be the following:


render: function(context, firstTime) {
  var name = '';
  var description = '';
  var age = '';
  var content = this.get('content');
  if (content != null)
  {
    name = content.get('name');
    description = content.get('description');
    age = content.get('age');
  }

  context = context.begin('div').addClass('user-summary-view-name').push(name).end();
  context = context.begin('div').addClass('user-summary-view-desc').push(description).end();
  context = context.begin('div').addClass('user-summary-view-age');
  context = context.begin('div').addClass('user-summary-view-age-value').push(age).end();
  context = context.begin('div').addClass('user-summary-view-age-capt').push('age').end();
  context = context.end();

  sc_super();
}

So what did we just do? We simply acquired the view’s content property (added by the SC.ContentDisplay mixin) and got its value for name, description and age using the content’s get() method. Nothin’ to it!

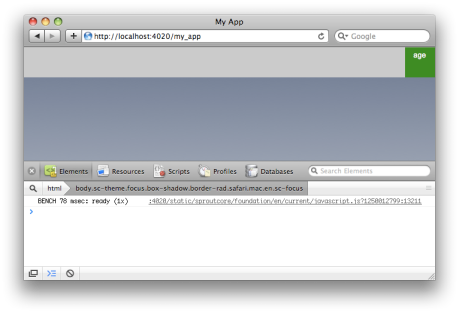
Now that we got all the view’s code it place let’s see what we can do. And like in part 1, we’ll just make use of a browser’s interactive JavaScript console so we can quickly see what is happening. Also remember to start up your application using sc-server. When you start up your browser and direct it to your application you should get the following:

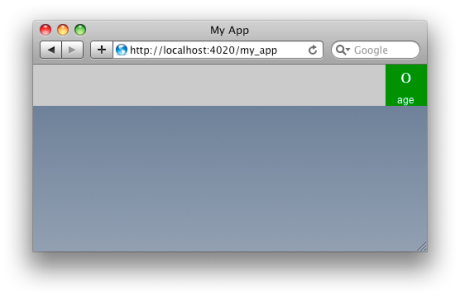
simplecustomview-part2-1

Our view is looking pretty empty but we’ll fix that in a moment. First, let’s create our user object in the console by typing the following:

var user = MyApp.User.create()

Now we have a user object ready to pass to our view. If you look inside the object you’ll see the default value for the object’s properties are empty, that will change but just wait. Okay, now let’s get a reference to our view by typing the following:

var view = MyApp.mainPage.mainPane.userSummaryView

Perfect. All we have to do now is pass our user object to our view by entering the following into the console:

view.set('content', user)

Very simple. Remember how in part 1 we set the properties on the view directly to update the view in the window as in view.set('name', 'Jon Doe')? Well we don’t do that now. Instead we are going to modify the user object to get the view to re-render. Enter the following:

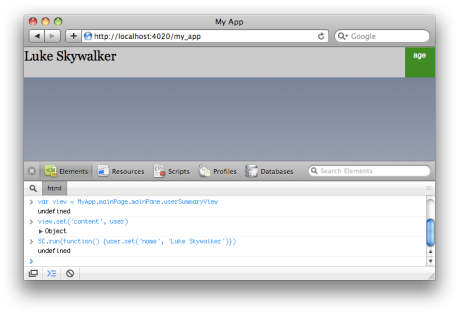
SC.run(function() { user.set('name', 'Luke Skywalker') })

If everything went smoothly you should now see the view updated that displays the name “Luke Skywalker” such as below:

simplecustomview-part2-2

Kick-ass! But why did this just happen? This is where SproutCore’s key-value observing (KVO) comes into play. The view is listening for changes to the content object and when we used the set() method on the user object that triggered the view to react. (We used the SC.run to make sure that the run loop was kicked off to see the changes in the browser immediately). This is pretty cool. Let’s go ahead and now modify the user object’s description and age like so:

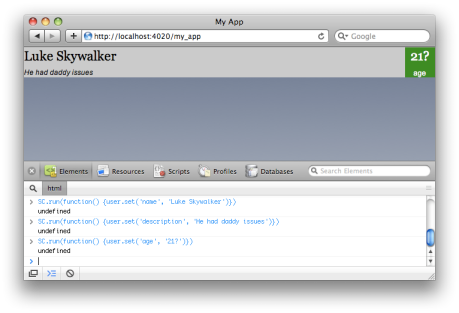
SC.run(function() { user.set('description', 'He had daddy issues') })
SC.run(function() { user.set('age', '21?') })

You should see the following:

simplecustomview-part2-3

Excellent! We have successfully updated our view to make use of a content object.

Before we wrap up part 2, I want to just go back to discuss the object being assigned to the view’s content property. Remember that I said the view doesn’t care about the object’s type. The view just cares that the object has the needed properties. So let’s see what that means by assigning a generic SproutCore object to the view’s content property and see what happens. Type the following into your console:

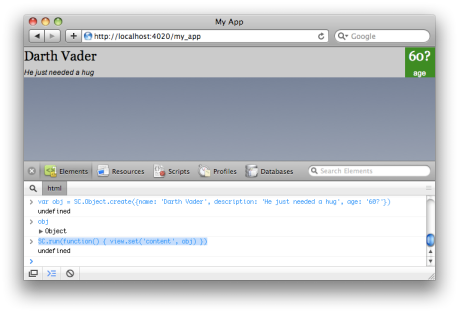
var obj = SC.Object.create({name: 'Darth Vader', description: 'He just needed a hug', age: '60?'})

Good. We just created a generic SproutCore object with properties name, description and age. Now type in the following:

SC.run(function() { view.set('content', obj) })

Again, if everything went fine you should see the following:

simplecustomview-part2-4

This confirms that the view just sees any object given to it as generic. The view just cares about the properties assigned to the object. Now normally in a SproutCore application you would be passing an content object to a view through a controller and make use of bindings, but we used the JavaScript console for quick demonstration purposes.

You have now become a little bit more advanced in creating a custom view in SproutCore. I’ll create future posts about doing more interesting stuff with custom views, but hopefully this and part 1 will get you on the right path. Be sure to check out other excellent blogs here and here to learn interesting SproutCore stuff. The complete code for the custom view is below:


MyApp.UserSummaryView = SC.View.extend(SC.ContentDisplay, {

  classNames: ['user-summary-view'],

  contentDisplayProperties: 'name description age'.w(),
	
  render: function(context, firstTime) {
    var name = '';
    var description = '';
    var age = '';
    var content = this.get('content');
    if (content != null)
    {
      name = content.get('name');
      description = content.get('description');
      age = content.get('age');
    }
	
    context = context.begin('div').addClass('user-summary-view-name').push(name).end();
    context = context.begin('div').addClass('user-summary-view-desc').push(description).end();
    context = context.begin('div').addClass('user-summary-view-age');
    context = context.begin('div').addClass('user-summary-view-age-value').push(age).end();
    context = context.begin('div').addClass('user-summary-view-age-capt').push('age').end();
    context = context.end();
		
    sc_super();
  }

});

[Update (Aug 18, 2009): Be sure to check out my update post that provides some clarification to this tutorial.]

Although SproutCore comes with a great set of general views for you to use right out of the box, you are probably going to still come to a point where you realize you need to create your own custom views to suit your needs. Creating a custom view in SproutCore can seem like an intimidating task for a newbie — it was for me. So in the aim of helping out all those who want to start dipping their toes into creating custom views, here’s one place to get started.

We are going to create a simple custom view that will be used to summarize a user. We’ll call the view User Summary and it will display the user’s name, a description of the user and the user’s age (just because we can). This seems okay to start off with. I often find that if you are going to create any custom view, it is good practice to start by working with plain old HTML to build the visible structure of what we want. Here is a preview of what we want the view to look like:

usersummaryview1

Okay, so to get started let’s first create a new SproutCore application called MyApp by running the following command:

sc-init MyApp

Now go into the new directory and run the following command:

sc-gen view MyApp.UserSummaryView

If everything went well you should now have some new files in your project. sc-gen helped us create a template for us to build our view on. You will see a file called user_summary.js in the my_app/apps/my_app/views folder. Open up user_summary.js file. You should see something like the following:


MyApp.UserSummaryView = SC.View.extend(
/** @scope MyApp.UserSummaryView.prototype */ {

  // TODO: Add your own code here.

});

The view looks pretty empty. Not to worry. We’ll be adding code to this baby soon enough! But before we jump into the view, we first need to do a few quick things.

First, we need to create a CSS file that will be used to make our view look nice. create a new CSS file in the english.lproj directory and call it style.css. Copy and paste the following into your CSS file:


.user-summary-view {
  position: relative;
  height: 50px;
  background-color: #c0c0c0;
}

.user-summary-view-name {
  position: absolute;
  top: 0px;
  left: 0px;
  font-family: georgia;
  font-size: 22px;
}

.user-summary-view-desc {
  position: absolute;
  left: 0px;
  bottom: 0px;
  font-family: arial;
  font-size: 12px;
  font-style: italic;
}

.user-summary-view-age {
  position: absolute;
  top: 0px;
  bottom: 0px;
  right: 0px;
  width: 50px;
  background-color: #008000;
}

.user-summary-view-age-value {
  padding: 0px;
  margin: 0px 0px 5px 0px;
  font-family: georgia;
  font-size: 22px;
  color: white;
  text-align: center;
}

.user-summary-view-age-capt {
  padding: 0px;
  margin: 0px;
  font-family: arial;
  font-size: 12px;
  text-align: center;
  color: white;
}

Great. Now we are going to update the main_page.js file located in the english.lproj directory. Replace the code in the file to be the following:


MyApp.mainPage = SC.Page.design({

  mainPane: SC.MainPane.design({
    childViews: 'userSummaryView'.w(),
    
    userSummaryView: MyApp.UserSummaryView.design({
      layout: { top: 0, left: 0, height: 50 },
    })
  })

});

If you try running the application using sc-server you won’t see much, but you will soon.

Now that we got the house cleaning done, let’s get to the good stuff! First and foremost: We always want to keep our views independent of everything else because: 1) it’s just good programming practice; 2) it makes it easier to test our view; and 3) maximizes the view’s reuse. Moving on.

For every view you are going to be dealing with two fundamental concepts. The first is to decide what properties the view will react to to update itself. The second is how to actually render the view using those properties. Let’s focus on the properties first.

We know that our view will display a user’s name, description and age, so those look like good properties for our view to have and others to bind to. Update your user_summary.js file to be the following:


MyApp.UserSummaryView = SC.View.extend({

  name: '',
  description: '',	
  age: 0,

  displayProperties: ['name', 'description', 'age']

});

In the code you see that we have added three basic properties. Pretty easy. Also, we added another interesting property to our view called displayProperties. This is used to inform the view to watch for changes to some or all of its properties in order to re-render the view. SproutCore hides a lot of the complexity so that we can focus on building our view and not get tied up in the plumbing.

Now for the second part — getting the view to render. We are going to add a render() function to our view, as so:


MyApp.UserSummaryView = SC.View.extend({

  name: '',
  description: '',	
  age: 0,

  displayProperties: ['name', 'description', 'age'],

  render: function(context, firstTime) {
    sc_super();
  }

});

By adding this function to our view, we have just overridden the parent view’s render function. This is the function where the real meat will be added to give us our end result. To start, we will get the values of the properties we will use to help render our view. Update the render method to be the following:


render: function(context, firstTime) {
  var name = this.get('name');
  var description = this.get('description');
  var age = this.get('age');

  sc_super();
}

Remember that in SproutCore we always want to get the value of a object’s property through the get() method instead of directly, like as in myObject.foo.

We’re almost there. Now we are going to make use of the argument context to create our HTML that SproutCore will eventually spit out to the browser. context is a SC.RenderContext object that is used to build the HTML. Think of the render context as a fancy string builder that queues up changes to an element. With the context in hand, let’s once more update the render() method to be the following:


render: function(context, firstTime) {
  var name = this.get('name');
  var description = this.get('description');
  var age = this.get('age');
	
  context = context.begin('div').addClass('user-summary-view');
  context = context.begin('div').addClass('user-summary-view-name').push(name).end();
  context = context.begin('div').addClass('user-summary-view-desc').push(description).end();
  context = context.begin('div').addClass('user-summary-view-age');
  context = context.begin('div').addClass('user-summary-view-age-value').push(age).end();
  context = context.begin('div').addClass('user-summary-view-age-capt').push('age').end();
  context = context.end();
  context = context.end();

  sc_super();
}

Because I know you’re eager to see something on the screen, let’s go ahead and update the browser (remember to have the sc-server running). You should see the following:

usersummaryview2

Yay! We’re finally getting something. It looks close to what we want. In fact, the view is ready to be used. But before we go any further, let’s go back and study what we added to the render() method.

With the context object, we make calls to its methods, such as calling begin(), end(), addClass(), push(). All these methods make it convenient to construct our view. begin() and end() create the start and end of a tag, such as div. addClass() adds a value to the tag’s class attribute. And push() is used to push any old string to build up your HTML. To see the reset of the context’s methods, go to the render_context.js file located in the SproutCore framework’s frameworks/foundation/system.

Now that we got the render context object out of the way, let’s get back to making our custom view do cool stuff. We are going to modify our view’s properties programmatically but we’ll do it through the use of a interactive JavaScript console. If you are using the Firefox browser then go ahead and use the JavaScript console that comes with the Firebug add-on. If you are using Apple Safari or Google Chrome (read: Webkit) then you can just use the built-in JavaScript debugger. I’ll be using the latest Safari.

To access our custom view in our application we are going to have to traverse the application’s object graph. Remember that when we initially created the application, SproutCore set up a root object called MyApp. So in our JavaScript console, we’ll acquire our view as follows:

var view = MyApp.mainPage.mainPane.userSummaryView

You should now have a reference to the view object. With view in hand let’s change its properties and see what happens. First, we’ll modify the view’s name property by entering the following into the console:

view.set('name', 'Skippy McGaven')

Now, if like me, you happen to hit enter and didn’t see anything happen, don’t fret. Just move your mouse over the browser’s window and the name will appear. I’m not sure why this is, but it appears you have to trigger an event to invoke SproutCore to update the view. No matter. You should now see our view with “Skippy McGaven” brightly displayed for all to behold, such as the following:

usersummaryview3

Again, remember that in order to set a SproutCore object’s properties you use the set() method (at least for the object’s public properties anyway).

Things are looking up! So let go the next mile and modify the view’s description property. Enter the following into the console:

view.set('description', 'Skippy always said that the answer to everything in life is 42')

Hit the enter button and remember to move your mouse over the browser’s window to see the changes if nothing happened. You should see the following:

usersummaryview4

We are on a role now! So let’s modify the view’s final property, age. Again, in the JavaScript console, enter the following:

view.set('age', 17)

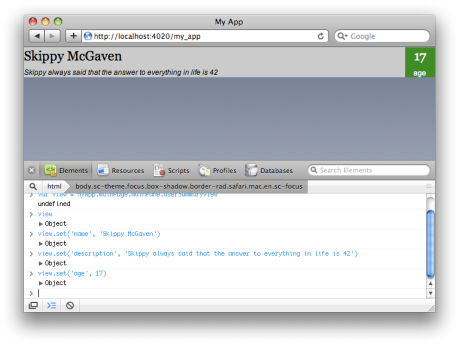
If all goes well you should see the final result:

usersummaryview5

Great work! Now its time to do the funky chicken dance in the end-zone.

Hopefully this tutorial showed you the beginnings of how to make a custom view. There is still more to making a full-blown custom view, but this is a good first step. In part 2, I’ll take this custom view and do a bit more advanced stuff by hooking up the view to a model object.

You can find the complete source for the custom view below:


MyApp.UserSummaryView = SC.View.extend({

  name: '',

  description: '',
	
  age: 0,

  displayProperties: ['name', 'description', 'age'],
	
  render: function(context, firstTime) {
    var name = this.get('name');
    var description = this.get('description');
    var age = this.get('age');
	
    context = context.begin('div').addClass('user-summary-view');
    context = context.begin('div').addClass('user-summary-view-name').push(name).end();
    context = context.begin('div').addClass('user-summary-view-desc').push(description).end();
    context = context.begin('div').addClass('user-summary-view-age');
    context = context.begin('div').addClass('user-summary-view-age-value').push(age).end();
    context = context.begin('div').addClass('user-summary-view-age-capt').push('age').end();
    context = context.end();
    context = context.end();

    sc_super();
  }

});

[Update (Aug 16, 2009): Be sure to check out my post discussing some updates to this tutorial here based on some of the feedback below.]

[Update (Aug 16, 2009): Part 2 of how to create a simple custom view has been added.]

When working with view objects you are going to be constantly dealing with how to position them within your web application. And in SproutCore, positioning views is kind of but not exactly like positioning elements in a typical web page using CSS. With views, you are going to be thinking about where a view is anchored within its parent view, what it’s relative position is to where the view is anchored, and its size.

To get a basic idea of just how SproutCore positions views, it’s best to work with a simple application. Start by first creating a new SproutCore application called layout by running the following command:

sc-init layout

Now run your application just to make sure everything is working as expected. Do this by running the following command within the layout directory created for you by sc-init:

sc-server

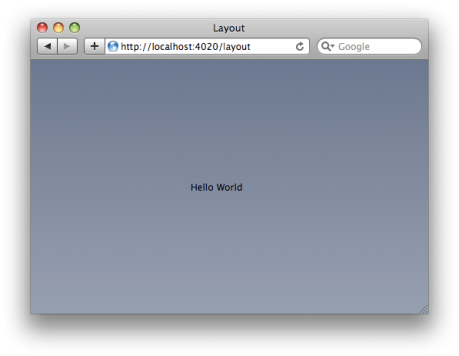
If everything went okay, you should be able to open up your favorite browser and go to http://localhost:4020/layout and see the screen shown below:

viewpic1

Okay, great. Now, to make it obvious just how the views are being positioned, we need to modify the look of the views. We will do this by creating a new CSS file called layout.css and placing it in the layout/apps/layout/english.lproj directory. In the CSS file enter the following:


h1 {
  border-style: solid;
  border-width: 1px;
  border-color: red;
  background-color: white;
}

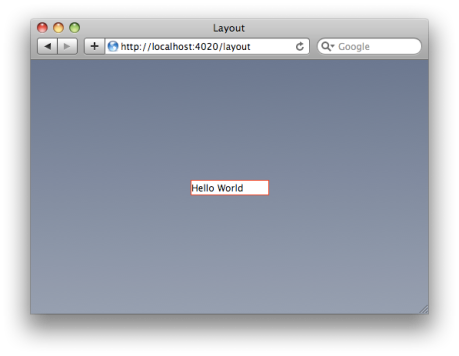
Awesome. If you refresh your browser you should get the following:

viewpic2

Now open up the main_page.js file located in the layout/apps/layout/english.lproj directory. This file is where you typically setup the views. You should see the following code (excluding comments):


Layout.mainPage = SC.Page.design({

  mainPane: SC.MainPane.design({
    childViews: 'labelView'.w(),
    
    labelView: SC.LabelView.design({
      layout: { centerX: 0, centerY: 0, width: 100, height: 18 },
      tagName: "h1", value: "Hello World"
    })
  })

});

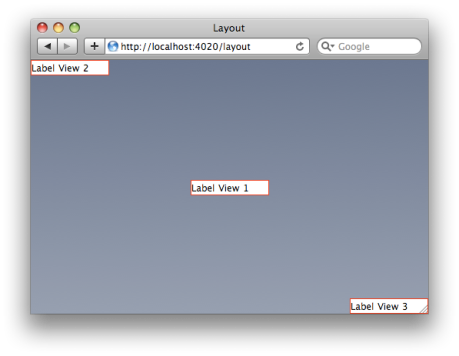
You’ll notice that there is a SC.LabelView object that is being setup within a SC.MainPane object. The main pane is the parent view of the label view. This parent-child view relationship is important in how the views get positioned by SproutCore. In the label view, the part we care about is the layout property. By default, the label is centered in the middle of the parent view (centerX: 0, centerY: 0), and its width is 100 pixels and height is 18 pixels. Let’s update the code so that the label view is called labelView1 and its value is “Label View 1”. In addition, let’s add two more label views called labelView2 and labelView3. We’ll position labelView2 so that it is positioned in the top-left corner of the pane and labelView3 is position in the bottom-right corner. The code should be the following:


Layout.mainPage = SC.Page.design({

  mainPane: SC.MainPane.design({
    childViews: 'labelView1 labelView2 labelView3'.w(),
    
    labelView1: SC.LabelView.design({
      layout: { centerX: 0, centerY: 0, width: 100, height: 18 },
      tagName: "h1", 
      value: "Label View 1"
    }),

    labelView2: SC.LabelView.design({
      layout: { left: 0, top: 0, width: 100, height: 18 },
      tagName: "h1", 
      value: "Label View 2"
    }),

    labelView3: SC.LabelView.design({
      layout: { bottom: 0, right: 0, width: 100, height: 18 },
      tagName: "h1", 
      value: "Label View 3"
    })
  })

});

So if you save your file and then reload your browser you should see the following:

viewpic3

Label views 1, 2 and 3 are all children of the main pane and as such SproutCore will do all the necessary work to make sure the views are positioned correctly. Note that although we are just using label views to understand how views are positioned, this still applies for most of the other views in SproutCore framework.

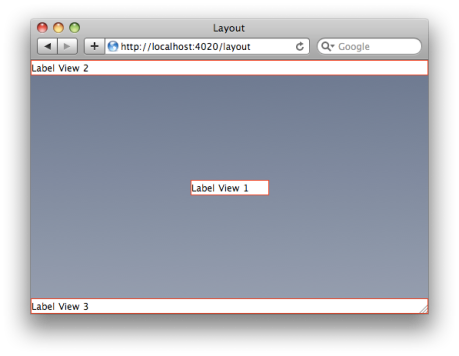
As of now, all the views have been given an absolute width and height, but that doesn’t have to be the case. In fact, let’s change our views so that the second label view and the third label view stretch out across the top and bottom of the browser window. Update the layout of the second and third label views to be the following:


...

labelView2: SC.LabelView.design({
  layout: { left: 0, top: 0, height: 18 },
  tagName: "h1", 
  value: "Label View 2"
}),

labelView3: SC.LabelView.design({
  layout: { bottom: 0, right: 0, height: 18 },
  tagName: "h1", 
  value: "Label View 3"
})
...

Save the file and refresh your browser. You should get the following:

viewpic4

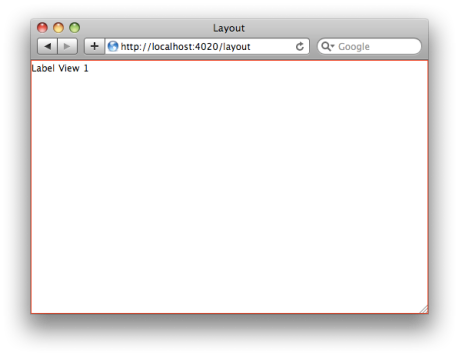
Huh. So by removing the width from each layout that informed SproutCore to stretch the views horizontally. Cool. Well, what about the first label view. How about if we would like to fill in the all the vacant space in the middle of the window instead of just sitting lonely in the middle. Let’s update the layout property of label view 1 to be the following:


...
labelView1: SC.LabelView.design({
  layout: { left: 0 },
  tagName: "h1", 
  value: "Label View 1"
}),
...

If you save your file and reload your browser you’ll end up getting the following:

viewpic5

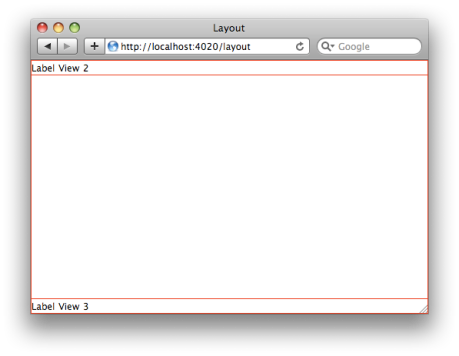
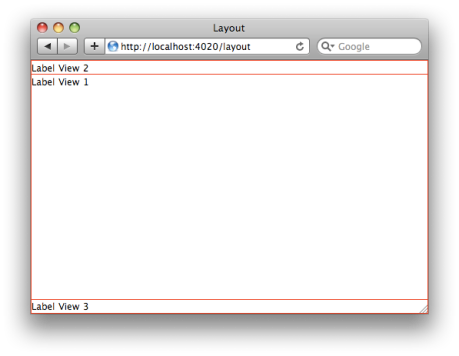
What the? Somethings not right! You’ll notice that the middle of the window is now all white, but no where do you see the text “Label View 1”. This doesn’t seem to make any sense. Actually it does. SproutCore followed your layout instructions and made label view 1 fill up the entire window, but label view 1 is partly hidden behind label view 2 and 3 because of the how the views have been layered. Go back to the code for a second. In the main pain you see a line of code reads the following:

childViews: ‘labelView1 labelView2 labelView3’.w(),

Because of the ordering, SproutCore is instructed to first render labelView1 as HTML and then render label views 2 and 3 as HTML. In reality, SproutCore is just consecutively placing the views as HTML one at a time and the browser uses its default CSS styling rules to layer the elements as normally does. So SproutCore is making use of the web browser to position and layer the element accordingly. Great. So what if we were to reorder to the main pane’s children to be the following:

childViews: ‘labelView2 labelView3 labelView1’.w(),

We’ll get the following screen:

viewpic6

Yay! We now see label view 1… er, wait, now label view 2 and 3 are no longer visible. Actually, they are there but because of the browser layers the HTML elements labels 2 and 3 are hidden behind label view 1. D’oh. Well then how do we get all three label views to appear correctly so that they aren’t overlapping each other? Turns out we have to do a little finessing with the positioning of label view 1. Notice how label view 2 and label view 3 each have a height of 18 pixels? Well that tells us that we have to shrink the height of label view 1 based on the other views’ size. Update label view 1’s layout property to be the following:

layout: { left: 0, top: 18, bottom: 18 }

Now save and refresh your browser. You should get the following:

viewpic7

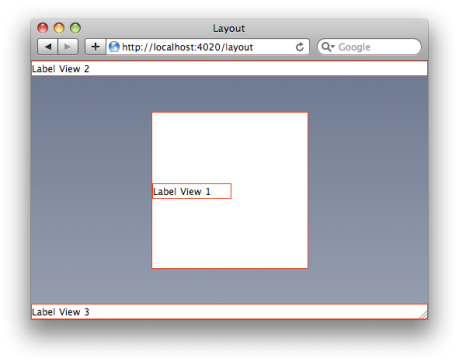
Yes! We finally got all three label views to be correctly visible. Basically, we told SproutCore to push label view 1 down from the top of the parent view (main pane) by 18 pixels and push it up from the bottom of the parent view by 18 pixels. This means we have to be mindful of both where a view is anchored and its size and position relative to the other sibling views within the same parent view.

Okay, this is great stuff. But we aren’t done just yet. Remember that it is important to know that the position of a view is based on the parent-child relationship. So let’s look at a bit more of a complex example where we place one view inside of another view instead of just in the main pane. We are going to add a generic view (a SC.View object) to our pane and put label view 1 inside of it. Update your code so that it is the following:


Layout.mainPage = SC.Page.design({

  mainPane: SC.MainPane.design({
    childViews: 'plainView labelView2 labelView3'.w(),
    
    plainView: SC.View.design({
      childViews: 'labelView1'.w(),
      layout: { centerX: 0, centerY: 0, width: 200, height: 200 },
      classNames: ['plainView'],
			
      labelView1: SC.LabelView.design({
        layout: { left: 0, centerY: 0, width: 100, height: 18 },
	tagName: "h1", 
	value: "Label View 1"
      })	
    }),

    labelView2: SC.LabelView.design({
      layout: { left: 0, top: 0, height: 18 },
      tagName: "h1", 
      value: "Label View 2"
    }),

    labelView3: SC.LabelView.design({
      layout: { bottom: 0, right: 0, height: 18 },
      tagName: "h1", 
      value: "Label View 3"
    })
  })

});

Our generic view is called plainView and labelView1 is now a child of it. We positioned label view 1 so that it will be placed left of center of the plain view. We also need to update our CSS file to be the following:


h1, .plainView {
  border-style: solid;
  border-width: 1px;
  border-color: red;
  background-color: white;
}

Finally, save all files and refresh the browser. You should get the following:

viewpic8

Boo-ya! We see that label view 1 is indeed positioned relative to the parent view’s boundaries. Go ahead and resize the window. Everything works as expected. Again, SproutCore is doing the rendering into HTML so that the browser at the end will correctly place all the elements according to its CSS rules. Check out the HTML source. You’ll see how everything is setup just so by SproutCore in order to give us the right look and feel.

So there ya are. While this was a basic look at how views are positioned, I hope it helped those new to the framework get a better grip of just how views are actually positioned in SproutCore. If you interested in more layout details you can dig through the view.js file’s comments located in the frameworks/foundation/views folder in the SproutCore root directory. Around line 1456 there is some decent comments on all the various layout attributes and how they can be combined together.